Trading Supply and Demand Zones: Master Strategies
The Hidden Power of Supply and Demand Zones
Let's be honest: Finding consistent turning points in the market is a challenge for most traders. Traditional support and resistance levels can feel subjective and often lead to frustrating false breakouts. That's where supply and demand zones offer a more robust approach. These zones provide valuable insights into the real driving forces of the market, highlighting where significant players, like institutions and professional traders, are accumulating or distributing their positions. Understanding these dynamics can significantly improve your market analysis.
Why Supply and Demand Zones Outperform Traditional Analysis
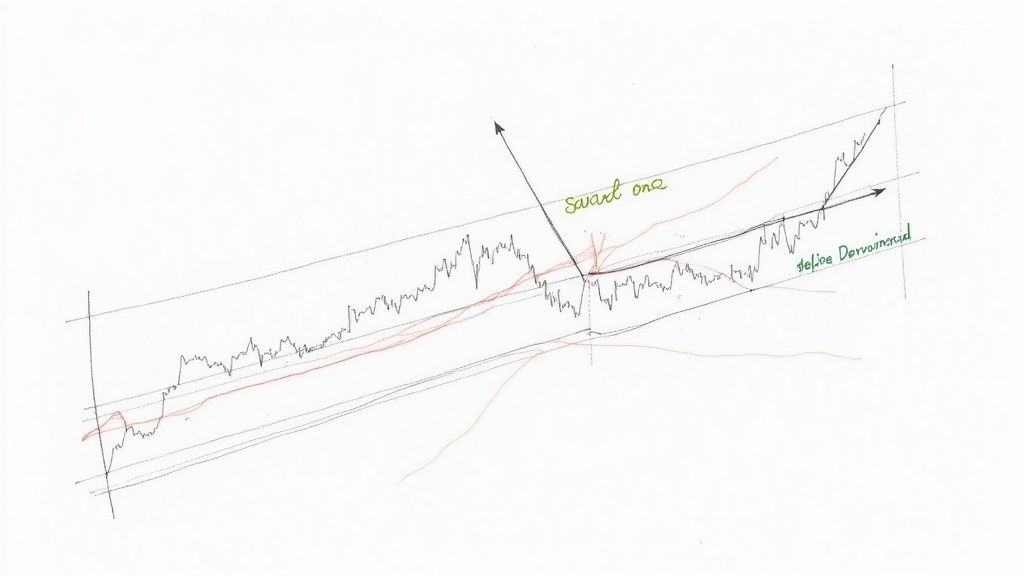
Supply and demand zones show areas of imbalance between buyers and sellers. Unlike single lines on a chart, they represent zones of price where substantial trading activity has previously taken place. A supply zone is like a ceiling where eager sellers push prices down. Conversely, a demand zone acts as a floor, attracting buyers and driving prices up. This nuanced perspective offers a clearer picture than simply identifying prior highs and lows like traditional support and resistance.
Imagine a stock that surges, retraces to a specific price range, and then rallies again. That pullback zone likely represents a demand zone, where institutional buyers are accumulating more shares. This institutional activity gives these zones predictive power.
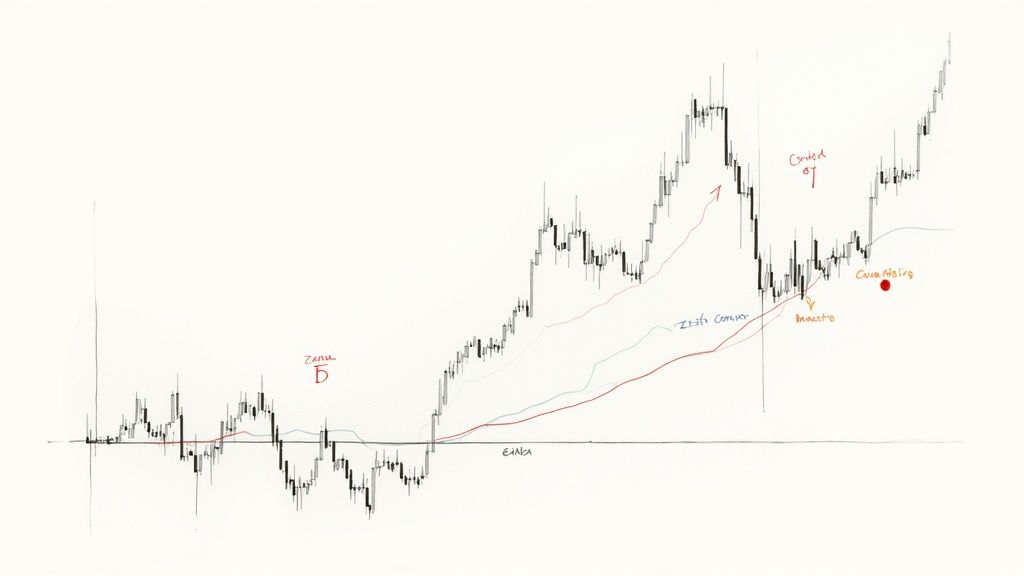
Historically, supply and demand zones have been key in forecasting market movements. They've proven essential for identifying potential reversals or continuations in price. These zones often exhibit strong buying or selling pressure, visible through price patterns and volume analysis. For example, a Rally-Base-Drop (RBD) pattern can indicate a supply zone, while a Drop-Base-Rally (DBR) pattern suggests a demand zone. High trading volume during the formation of these zones confirms strong market participation, increasing their reliability for trading decisions. Want to delve deeper? Learn more about supply and demand zones.
Recognizing the Psychological Dynamics at Play
The effectiveness of supply and demand zones comes down to market psychology. These zones are areas where traders have formed strong emotional connections to price. In a supply zone, sellers resist higher prices, creating a barrier to upward movement. Conversely, buyers in a demand zone aggressively accumulate at lower prices, providing support and potentially fueling a rally. This collective market psychology makes these zones valuable predictors of future price action. Understanding these psychological forces empowers traders to anticipate and capitalize on market moves.
The timeframe of a zone is also crucial. A zone formed on a higher timeframe, like a daily or weekly chart, holds more weight than one on a lower timeframe, such as a 15-minute chart. Higher timeframe zones reflect longer-term imbalances, involving larger players and greater volume, making them more significant for predicting major market shifts. Using these higher timeframe zones can greatly improve the accuracy of your trading.
Spotting High-Probability Zone Formations
Identifying supply and demand zones is just the first step. The real skill lies in recognizing high-probability formations, the ones that truly offer a trading edge. This involves understanding specific patterns that signal powerful supply and demand areas, not just any random zone. We'll explore how formations like the Rally-Base-Drop (RBD) and Drop-Base-Rally (DBR) can reveal underlying institutional activity.
Rally-Base-Drop (RBD) and Drop-Base-Rally (DBR) Formations
The RBD is a classic indicator of a supply zone. It signifies a rapid price increase (the rally), followed by a period of consolidation (the base), and finally a sharp drop (the drop). This pattern suggests that large sellers have entered the market at the top of the rally, creating an area of overhanging supply. Imagine a stock that quickly jumps 10%, pauses briefly, and then plummets 5%. This could be a strong RBD formation, indicating a potential supply zone around the 10% high.
Conversely, the DBR signifies a demand zone. It involves a rapid price drop, a period of consolidation, and a strong rally. This pattern often suggests institutional buyers stepping in at the bottom of the drop, creating a base for future price appreciation.
Identifying Clean Vs. Exhausted Zones
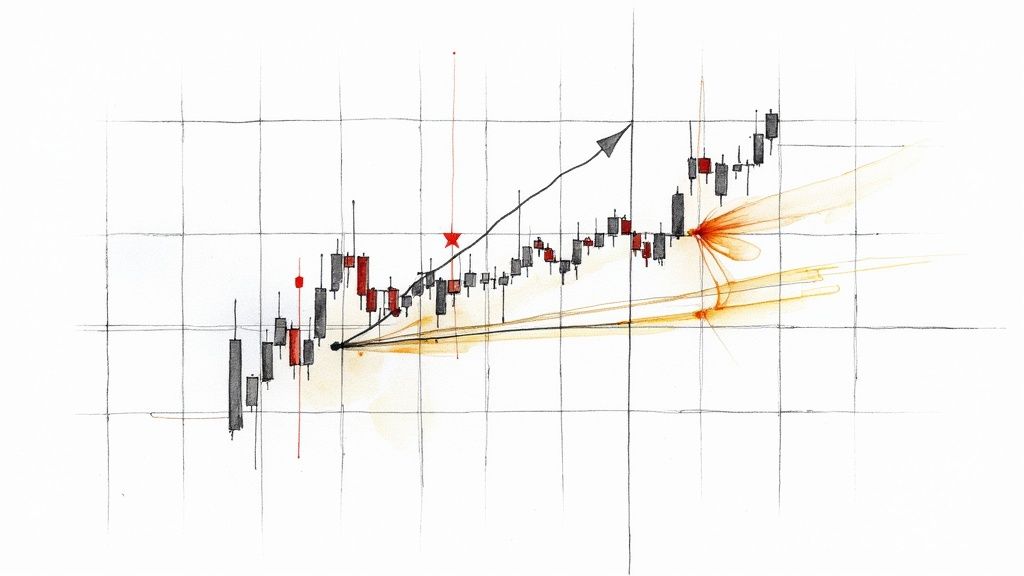
Distinguishing between clean and exhausted zones is vital for successful trading. A clean zone hasn't been retested multiple times. It represents a fresh area of imbalance, untouched after its initial formation. These untested zones typically have a higher probability of working as intended.
An exhausted zone, on the other hand, has been retested several times. Each retest weakens its potency as the initial imbalance diminishes. Trading within exhausted zones is often riskier due to the increased chance of false breakouts.
To better understand the differences between these two types of zones, let's look at the following table:
Supply vs. Demand Zone Characteristics
| Characteristic | Supply Zones | Demand Zones |
|---|---|---|
| Formation Pattern | Rally-Base-Drop (RBD) | Drop-Base-Rally (DBR) |
| Price Action | Sharp drop after a rally and consolidation | Strong rally after a drop and consolidation |
| Institutional Activity | Large sellers entering the market | Institutional buyers stepping in |
| Retests | Fewer retests (clean zones are more reliable) | Multiple retests weaken the zone (exhausted zones) |
As this table highlights, clean supply and demand zones, characterized by fewer retests, generally offer higher probability trading setups compared to their exhausted counterparts.
Price Action Signals and Common Traps
Subtle price action signals can further confirm a zone's reliability. For example, a strong rejection of price at a supply zone, marked by long wicks or bearish engulfing candles, strengthens the likelihood of a downward move. Conversely, strong bullish candles at a demand zone suggest buying pressure and potential upside movement.
However, traps can catch inexperienced traders. One common trap is mistaking a temporary pullback within a trend for a legitimate zone. Just because the price drops temporarily doesn't automatically signify a demand zone. Look for confirming factors like RBD/DBR patterns and volume analysis to validate the zone. Another trap is blindly trading any zone without considering the broader market context. Always analyze the market's overall direction before entering a trade based on supply and demand zones. Learn more about avoiding pitfalls at ChartsWatcher's blog.
How Smart Money Shapes Trading Zones

Behind every significant supply and demand zone, you'll often find the influence of institutional investors. These major players, armed with substantial capital, leave their mark on the market, shaping the very zones we trade. Understanding how this "smart money" operates is crucial for unlocking the predictive power of these zones. It can change how you interpret price action.
Deciphering Institutional Footprints
Experienced traders recognize that institutional activity isn't random. Large firms, including banks and hedge funds, accumulate and distribute their positions strategically. They often focus on specific price levels they perceive as valuable.
Institutional involvement is a major factor in forming supply and demand zones. These large financial institutions contribute to these zones by placing orders at these perceived value levels.
For instance, if a bank believes a stock is undervalued at $10 per share, it might accumulate shares at or below that price. This creates a demand zone. Conversely, if the institution wants to exit a position at $20, it will sell at or above that price, creating a supply zone. This strategic buying and selling over time establishes these crucial zones. Explore this topic further. This methodical approach builds the foundation of supply and demand zone creation.
Identifying Liquidity Pools and Accumulation Phases
A critical aspect of institutional trading involves identifying liquidity pools. These are areas where large orders can be filled efficiently, offering the necessary liquidity for institutions to execute their trades. These pools often overlap with areas where retail traders place their stop-loss orders.
Sometimes, institutions target these areas. They understand that triggering stop-loss orders can add momentum to their intended direction. This isn't manipulation, but a calculated move based on predictable market behavior.
In addition, institutions often practice patient accumulation, gradually building positions over time. This creates strong demand zones that can drive significant upward price movements.
For example, a hedge fund might slowly accumulate shares of a company they believe is undervalued. This gradual buying creates a demand zone that astute traders can identify. As retail traders notice the upward momentum, they often enter the market, further fueling the rally started by the institutional buying. This creates a powerful, self-reinforcing cycle. Read also: How to master supply and demand zone trading strategies.
The Insider Advantage
By understanding how smart money operates, you gain a valuable edge. You can anticipate potential market movements before they become obvious to most retail traders. This allows you to position yourself strategically, entering trades with a higher probability of success.
This understanding goes beyond technical analysis. It's about recognizing the fundamental forces driving market behavior. By identifying these institutional footprints, you significantly enhance your trading edge and improve your overall market analysis.
Separating Strong Zones From Weak Imposters
Not all supply and demand zones offer the same trading opportunities. Some are excellent, while others are deceptive and can lead to losses. This is why having a structured framework for validating zones is essential. Experienced traders know this and use robust methods daily to assess zone strength.
Key Factors Determining Zone Strength
Several factors influence the strength of a trading zone. Speed of formation is critical. A zone formed quickly, with a sharp price movement, suggests strong conviction among buyers or sellers. This often indicates substantial institutional activity.
The momentum before the zone forms also plays a vital role. A zone emerging after a strong trend is typically more reliable than one appearing after consolidation or choppy price action. A demand zone forming after a sharp decline, for example, is often a strong signal, particularly as the market begins to rise.
The candlestick structure within the zone provides additional clues. Strong bullish candles in a demand zone, or strong bearish candles in a supply zone, confirm the underlying sentiment. Imagine seeing long-bodied candles within a demand zone. This shows eager buyers entering the market and suggests the zone is likely to hold.
Time Decay and Market Context
A zone's strength isn't constant. Time decay weakens a zone’s reliability. A zone that performed well a month ago might not be as effective today. Focusing on more recent formations is essential.
Market context is also important. A zone might be strong in a trending market but weak in a ranging market. During periods of high volatility, even well-established zones can break down due to increased market uncertainty.
This highlights the dynamic nature of supply and demand zones. They are not fixed points but areas of influence whose strength fluctuates. Grasping this dynamic is crucial for trading success.
Scoring Zones by Probability
To objectively assess zone strength, traders can use a scoring system. This provides a structured way to rank zones based on several factors. Assign points based on formation speed, preceding momentum, candlestick structure, and time decay. This framework allows for filtering out weak zones and focusing on high-probability setups. A zone scoring 8 out of 10, for instance, is stronger than one scoring 3 out of 10.
The following table, "Zone Strength Assessment Framework," offers a system for evaluating zone strength:
Zone Strength Assessment Framework
| Assessment Factor | Strong Zone Indicators | Weak Zone Indicators | Point Value |
|---|---|---|---|
| Formation Speed | Rapid, sharp price movements | Slow, gradual price movements | 2 |
| Preceding Momentum | Strong trend leading into the zone | Weak or no trend leading into the zone | 2 |
| Candlestick Structure | Strong bullish/bearish candles within the zone | Weak or indecisive candles within the zone | 3 |
| Time Decay | Recent formation (within the past few days/weeks) | Older formation (several weeks or months old) | 3 |
By using this framework, traders can objectively assess the strength of a zone. This lets them concentrate on zones with the highest potential return and greatest statistical edge, optimizing their trading strategy. This approach transforms subjective observations into a quantifiable process, vital for consistent profitability.
Trading Zones With Surgical Precision
Identifying strong supply and demand zones is only half the battle. This section explains how to turn that analysis into consistent profits using proven trading strategies. It means moving beyond simply recognizing zones and learning to trade them with pinpoint accuracy.
Entry Techniques: From Aggressive to Conservative
Professional traders use a variety of entry techniques when trading supply and demand zones. Aggressive traders often prefer zone-edge entries. They enter right at the zone's edge, aiming to capture the maximum potential profit. This approach requires precise timing and comes with higher risk. The potential rewards, however, can be substantial.
Conservative traders, conversely, often opt for confirmation entries. They look for confirming price action signals, such as a bounce off the demand zone or rejection from the supply zone. This confirms their analysis before entering a trade, offering lower risk but potentially sacrificing some profit.
Stop Placement: Protecting Capital and Giving Trades Room to Breathe
Accurate stop placement is essential for managing risk and protecting your capital. Stops should be placed strategically to guard against unfavorable price moves while allowing trades enough room to develop. Stops placed too tightly can lead to early exits, while stops placed too loosely can result in larger losses.
One common strategy is placing stops just outside the zone. When buying at a demand zone, for instance, place your stop-loss just below the zone's lower boundary. This protects against a false breakout and minimizes potential losses.
Take-Profit Strategies: Maximizing Winning Trades
Several take-profit strategies exist, each suited to different market conditions. Some traders prefer fixed take-profit targets based on a predetermined risk-reward ratio. Others prefer trailing stops to secure profits as the price moves favorably.
Partial exit strategies can maximize winning trades by taking profit on a portion of the position at different price levels. This secures some profit early while letting the remaining position capture further gains.
For example, a trader might take profit on 50% of their position at the first target and then trail a stop-loss for the remaining 50%, allowing it to potentially run further.
Position Sizing and Trade Management: Mastering Risk-Reward
Position sizing, the amount of capital allocated to each trade, should relate to the zone's perceived strength. Stronger zones may justify larger positions, while weaker zones warrant smaller allocations. This responsive approach to position sizing optimizes risk management and capital allocation.
Effective trade management involves actively monitoring open trades and adjusting positions as needed. This could include moving stop-loss orders to lock in profits or adding to winning positions as the trade progresses.
Adapting to Different Market Conditions
Trading supply and demand zones effectively requires adapting to various market conditions. In trending markets, zones often serve as excellent entry points to capitalize on momentum. In ranging markets, zones can define the boundaries of the range, creating opportunities to buy at demand zones and sell at supply zones.
During periods of high volatility, zone reliability can decrease. Adjusting your trading strategy during volatile periods is crucial to mitigate risk. See our guide on Breakout Trading strategies for more insights on navigating these market conditions.
Through detailed examples across trending, ranging, and volatile markets, traders can hone skills in position sizing, stop placement, and entry/exit techniques. This develops trade management expertise that dramatically improves risk-reward outcomes across any timeframe, allowing for consistent identification and exploitation of high-probability trading opportunities.
The Measurable Edge: Results You Can Expect
Moving beyond subjective market analysis, trading with supply and demand zones offers quantifiable advantages. This method provides a structured framework, leading to noticeable improvements in trading performance. Let's explore how these zones impact key metrics.
Win Rate and Risk-Reward Ratio: A Winning Combination
A major benefit of zone-based trading is its potential to boost your win rate. By concentrating on high-probability setups within defined zones, traders increase their chances of success. Instead of chasing every market move, zone traders wait patiently for price action to reach key levels. This leads to more selective, and often more profitable, entries. This disciplined approach can lead to a higher win rate than strategies using traditional indicators.
Zone-based trading also naturally creates favorable risk-reward ratios. The clear boundaries of supply and demand zones allow for precise stop-loss placement. This minimizes potential losses while maximizing potential gains. For instance, a trader might identify a demand zone and set a tight stop-loss just below its lower boundary. A profit target significantly higher within the zone creates a potentially lucrative risk-reward profile.
Studies show that zone-based strategies have higher success rates. A 2023 study revealed a roughly 72% success rate for traders using zone analysis to pinpoint price reversals. This outperforms the 50% success rate of traders relying solely on standard support and resistance. This difference highlights the effectiveness of zones in capturing market sentiment. Find more detailed statistics here.
Drawdown Metrics: Minimizing Losses and Protecting Capital
Drawdown, the peak-to-trough decline in a specific period, is a critical performance metric. Zone-based trading can minimize drawdown by providing clear exit points. The zone boundaries dictate stop-loss order placement, limiting losses and protecting capital. This risk management discipline is essential for long-term success. By controlling losses, traders preserve capital and navigate market volatility.
Professional Fund Managers and Zone-Based Trading
Professional fund managers often use supply and demand zones in their systematic trading. These zones provide a robust way to identify high-probability setups and manage risk. By grasping supply and demand principles, fund managers make informed decisions and potentially generate consistent returns. Zone-based trading aligns with many institutional investors' disciplined strategies.
From Inconsistency to Reliable Results: Real Trader Journeys
Many traders struggling with inconsistency find that zone-based methods significantly improve their results. By concentrating on these key market areas and applying these principles, traders can transition from erratic performance to more predictable profits. The structure and clarity offered by supply and demand zones can transform trading, leading to increased confidence and better outcomes.
Ready to improve your trading with supply and demand zone analysis? ChartsWatcher provides the tools to identify, analyze, and trade these setups. Visit ChartsWatcher today and unlock the potential of zone-based trading.
