Trading ABCD Pattern: Expert Guide to Profitable Trading
Trading the ABCD pattern is all about spotting a specific four-point price structure that can predict market reversals with surprising accuracy. It’s one of the foundational harmonic patterns, built on symmetrical price moves. Think of it like a lightning bolt on your chart: an initial price leg (AB) is followed by a retracement (BC), and then a final leg (CD) that is often equal in length and time to the first.
This shape gives you a clear, rules-based framework for anticipating where a market might turn.
Decoding the DNA of the ABCD Pattern
Before you even think about placing a trade, you need to understand why the ABCD pattern is such a cornerstone of technical analysis. This isn't just about connecting dots on a chart; it's about learning to read the market's natural rhythm and flow. At its core, the pattern shows you the balance between a market's impulse moves and its corrective pullbacks, which often creates a predictable structure.
The real magic happens when these price swings line up with specific Fibonacci ratios. This alignment gives traders a high-probability zone where a reversal is likely to happen. It's like learning the basic grammar of price action—a skill you absolutely need to anticipate market turns.
The Four Key Points of the Pattern
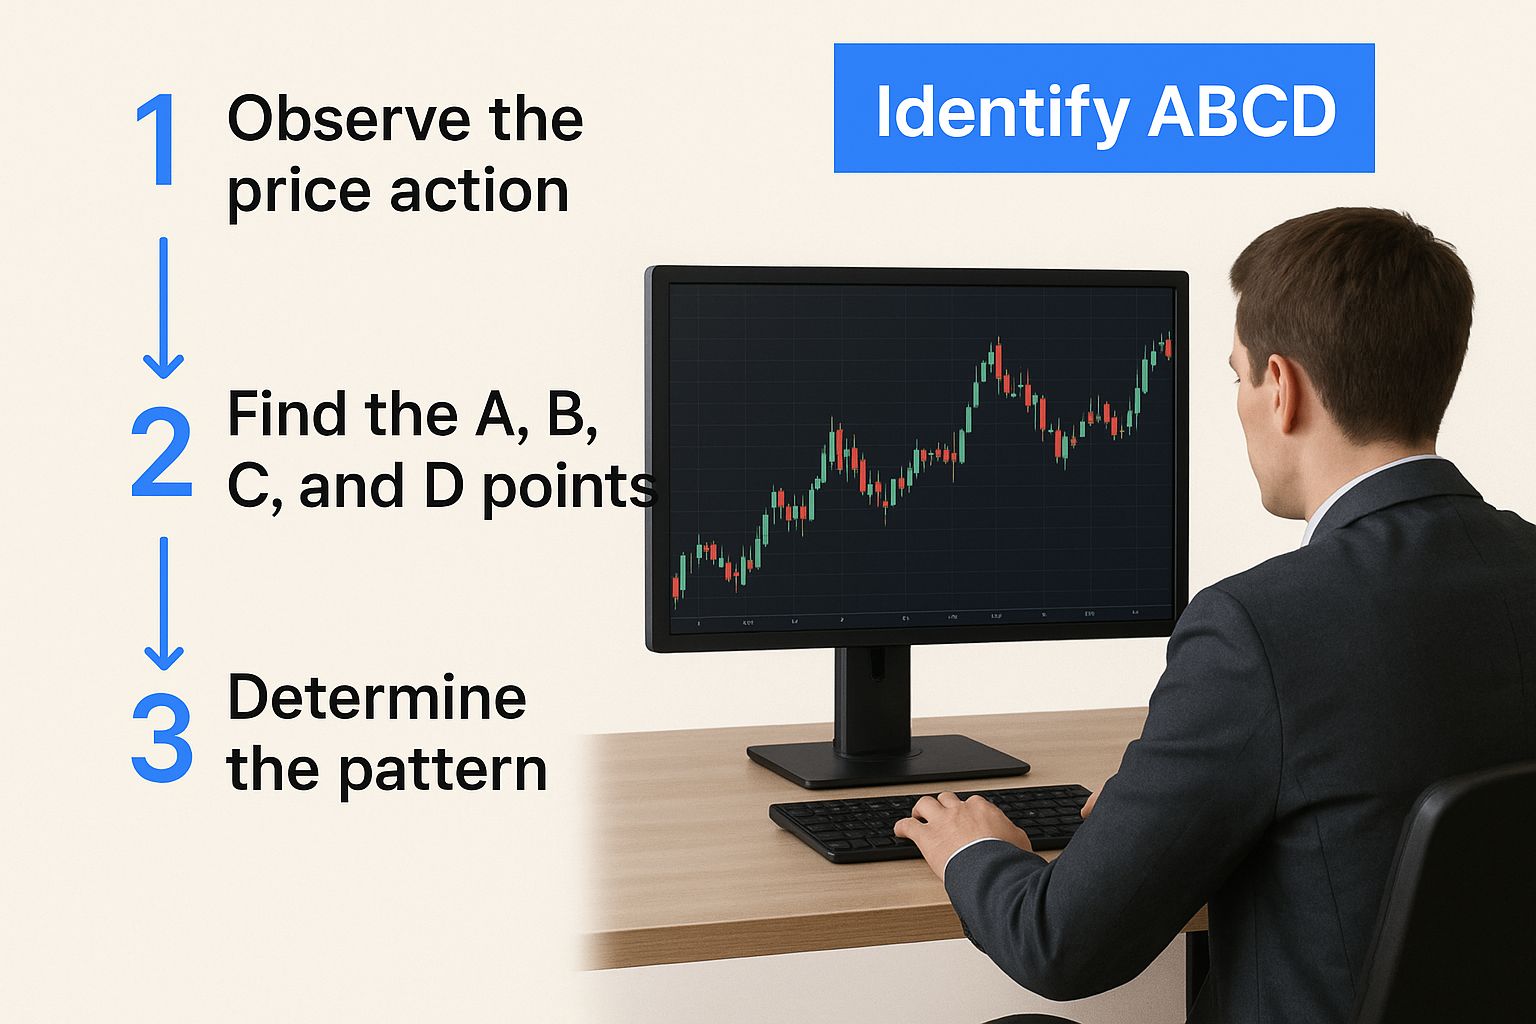
So, how is this pattern built? Every ABCD is made of four distinct swing points, and each one has a job to do.
This structure's power comes from its deep roots in market history. The ABCD pattern rose to prominence thanks to H.M. Gartley's work back in the 1930s. His research blended geometric shapes with Fibonacci ratios, laying the groundwork for what we now call Harmonic Trading.
The key is the symmetrical formation. An initial move (AB) is partially retraced by the BC leg (often to a 61.8% level). This is followed by an equal or proportionate move in the CD leg, which frequently extends to a 127.2% or 161.8% level of the BC leg. You can dive deeper into the history and nuances of the ABCD pattern on TradeFundrr.com.
Let's break down the role of each point in a bit more detail.
Anatomy of the ABCD Pattern
Here’s a quick-glance table breaking down the four points of the pattern. Understanding what each point signifies is crucial for identifying and trading it correctly.
| Pattern Point | What It Represents | Trader's Action |
|---|---|---|
| Point A | The start of a significant price move. | Identify the initial impulse. |
| Point B | The end of the first leg (AB) and start of the retracement. | Measure the first move. |
| Point C | The end of the corrective leg (BC). Must not exceed Point A. | Confirm the retracement is valid. |
| Point D | The completion point (CD leg) and potential reversal zone. | Look for trade entry signals. |
This simple structure is your map. When you see these points forming, you're not just guessing; you're applying a time-tested model of market behavior.
Key Takeaway: The relationship between the AB and CD legs is the heart of the pattern. In a classic ABCD, the length and time it takes for the price to travel from A to B should be nearly identical to the price movement from C to D.
This symmetry provides a clear framework. When you spot a potential setup, you're using this model to pinpoint where supply and demand might be about to shift. Mastering this turns chaotic-looking charts into a map of clear opportunities, giving you a solid edge before you risk a single dollar.
Alright, let's get into the nitty-gritty of how to actually find and validate an ABCD pattern on your charts. Seeing a potential zigzag is one thing, but knowing if it's a high-quality, tradable setup is what separates the pros from the amateurs.
This is where you have to roll up your sleeves and become a true pattern hunter. You’ll need to get comfortable with the drawing and Fibonacci tools that are standard on most charting platforms.
A real ABCD pattern isn’t just some random shape on the screen. It's a structure defined by specific mathematical relationships—the Fibonacci ratios. These ratios are what give the pattern its predictive muscle, turning a simple "lightning bolt" shape into a setup you can actually build a strategy around. If you skip the measurements, you’re just guessing.
As you can see, the whole process starts with training your eye to spot that initial structure amidst all the market noise.
Measuring The Legs For Precision
First things first, grab your Fibonacci retracement tool. You’re going to draw it from point A to point B to see how deep the BC leg’s pullback is.
- The Classic Setup: A BC leg that pulls back to the 61.8% or 78.6% level of the initial AB leg is what I consider a textbook pattern. This is a great sign the market is respecting those classic Fibonacci levels.
- The Shallow Pullback: You'll also see pullbacks to the 38.2% or 50.0% levels. These can be valid, too, but they usually pop up in very strong, fast-moving trends. I tend to be a bit more cautious with these.
Next up, you need to project where the CD leg might end. For this, you’ll switch to a Fibonacci extension or projection tool. Measure from the start of the BC leg to the end of it (from B to C), and then project that measurement outwards.
Pro Tip: Think of the CD leg as a price magnet. The most common target area for point D is a 127.2% or 161.8% extension of the BC leg. When one of these extension levels lines up perfectly with the AB=CD length, you've got a much stronger confluence, and the probability of the setup playing out goes way up.
Differentiating Good Setups From Bad Ones
Look, not every pattern that resembles an ABCD is worth your capital. The ones you want to trade are clean, symmetrical, and cleanly respect those key Fibonacci ratios. If you see a messy, choppy pattern where the swing points are fuzzy and unclear, that's a major red flag. Just walk away.
The best setups have a certain visual clarity. Notice in the chart below how the legs are distinct and the reversal at point D is sharp and decisive. That’s the kind of structure you should be looking for.
While the specifics here are for the ABCD, learning to validate patterns with this kind of technical rigor is a skill that pays dividends across the board. It's an area where digging into broader financial analytics insights can really sharpen your edge.
Ultimately, spotting these formations becomes second nature with enough screen time and practice. If you want to fast-track that process, you should definitely check out our complete guide to master ABCD pattern trading strategies to see more real-world examples. The more you practice, the faster your brain will learn to separate the high-probability trades from the market noise.
Validating Signals and Managing Your Risk

Spotting a perfectly measured ABCD pattern on your chart is an exciting moment, but it's crucial to remember that a pattern is not a trade signal. Think of it as a map highlighting a potential turning point. The next, and arguably most important, step is to validate that potential and build a solid defense for your capital.
This is where you shift from being a pattern-spotter to a professional trader. Validation is all about stacking the odds in your favor by looking for multiple, independent clues that confirm the story the pattern is telling. Without this confirmation, you're essentially trading on a guess.
Using Indicators for Confirmation
One of the most effective ways I've found to validate the completion point (Point D) is to use momentum indicators. My personal go-to is the Relative Strength Index (RSI).
When a bullish ABCD pattern completes with a new price low at Point D, I want to see the RSI making a higher low. This is classic bullish divergence. It’s a powerful sign that selling pressure is quietly weakening, even as the price makes one last push down.
The opposite is true for a bearish ABCD pattern. As price makes a new high at Point D, I’m looking for a lower high on the RSI. This bearish divergence is a red flag that the buying frenzy is running out of steam.
Another key piece of evidence is volume. A high-quality reversal at Point D is often accompanied by a noticeable spike in trading volume. This surge can indicate that institutional traders are stepping in, adding significant weight to the potential reversal.
Building Your Risk Management Plan
No trading strategy is foolproof. Not even a textbook ABCD pattern. This is why a non-negotiable risk management plan is the foundation of long-term survival in the markets. Before you ever click "buy" or "sell," you must know two things with absolute certainty: where you are wrong and where you will take profits.
Your stop-loss order is your ultimate protection. For an ABCD pattern setup, the placement is quite logical:
- For a bullish (buy) setup: Place your stop-loss just below the low of Point D.
- For a bearish (sell) setup: Set your stop-loss just above the high of Point D.
This approach defines your risk clearly and keeps it contained. Avoid placing it so close that normal market noise could knock you out, but don't set it so far away that a losing trade becomes a major blow to your account.
Defining your profit targets is just as crucial. A common approach is to use the Fibonacci retracement tool on the entire A-to-D move. The 38.2% and 61.8% retracement levels serve as excellent initial profit targets where you can scale out of your position.
This discipline of pre-defining your risk and reward is the bedrock of professional trading. To go deeper, exploring established risk management frameworks is your strategic guide to building a robust trading plan. This is what transforms pattern trading from a gamble into a calculated business decision.
Practical Entry and Exit Trade Strategies
Alright, you’ve spotted a promising ABCD pattern and validated it with ChartsWatcher. Now comes the part where theory hits the pavement: executing the trade. This is what separates traders who get lucky from those who build consistency. You need a solid game plan for getting in and getting out.
Let's break down how to manage your trade from start to finish, because a great setup means nothing without a great execution strategy. The first big decision is always how you're going to enter. There’s no single "right" way—it really boils down to your personal trading style and how much risk you're comfortable with.
Choosing Your Entry Method
One popular tactic is to place a limit order right at point D, the pattern’s completion point inside the Potential Reversal Zone (PRZ). This is an aggressive move. The upside? You’re aiming for the absolute best entry price. The downside? You might jump the gun before the market has actually decided to reverse. It can feel like catching a falling knife if you’re not careful.
A more conservative approach is to wait for confirmation. This means you’re patiently watching for a clear price action signal after the pattern completes at point D.
- For a Bullish ABCD: You could wait for a bullish engulfing candle or a hammer to form.
- For a Bearish ABCD: Keep an eye out for a bearish engulfing candle or a shooting star to signal your entry.
With this method, you'll probably get a slightly less perfect entry price. But what you give up in price, you gain in confidence, knowing the market has already started to show its hand and move in your favor.
Key Takeaway: Waiting for a confirmation candle is a trade-off. You might sacrifice the optimal entry price, but you significantly lower the risk of getting caught in a false reversal.
Managing the Trade with Profit Targets
Once you're in the trade, you can't just set it and forget it. Smart trade management is about locking in gains and protecting your capital. A great way to do this is by taking partial profits at predefined levels.
I find a Fibonacci retracement tool, drawn from the start of the pattern (Point A) to its completion (Point D), works perfectly for this.
- Target 1 (TP1): The 38.2% retracement is a fantastic spot to take your first bit of profit off the table.
- Target 2 (TP2): The 61.8% retracement is a logical second target to aim for.
Here’s a pro tip: once you hit your first profit target, move your stop-loss to your entry price. This immediately makes the rest of the trade "risk-free." It takes the stress out of the equation and lets you ride the rest of your position toward the second target without worrying about it turning into a loser.
Real-World Application and Context
In practice, the ABCD pattern gives you a clear, structured way to find entry and exit points, which is why it's so useful across different markets, from major stock indices to forex pairs. Its strength lies in its defined structure—Point D gives you the entry signal, and the Fibonacci levels provide logical exits.
But remember, no pattern is foolproof. Market volatility can always throw you a curveball and cause a false signal. To see how this pattern is applied in different scenarios, you can find more examples of how to apply this pattern on TradingView.com.
While mastering the ABCD pattern is a huge step, it's also smart to understand how these concepts fit into the broader market. Seeing how pros handle live stocks, options, and futures trading can provide valuable context. This entire blueprint—confirming your entry, setting profit targets, and managing risk—is what creates a repeatable process for trading the ABCD pattern successfully.
Common Mistakes and How to Avoid Them
Knowing the textbook ABCD pattern is one thing. Knowing how to trade it in the wild, with real money on the line, is another beast entirely. The path to getting good with this pattern is littered with the same few mistakes that trip up most traders.
Even with a setup that looks picture-perfect, psychological traps and simple oversights can turn a potential winner into a frustrating loss. Let's walk through the classic blunders so you can sidestep them.
Don't Force a Trade That Isn't There
This is probably the most common sin. You want to find a trade, so you start seeing patterns that aren't quite right. You squint at the chart, fudge the lines a bit, and conveniently ignore that the Fibonacci ratios are off.
This is just confirmation bias, and it's a fast way to bleed your account. A high-probability ABCD pattern is precise. If the measurements don't line up, it's not a valid setup. Period. The best move is to simply walk away and wait for a cleaner opportunity. Patience pays.
Another huge pitfall is letting a "perfect" setup convince you to abandon your risk management. You see a pattern that looks like a sure thing, so you think, "Maybe I'll skip the stop-loss this one time," or you pile on a much larger position than usual.
Expert Insight: No pattern is a crystal ball. The one time you break your rules will inevitably be the one that turns into a gut-wrenching, account-damaging loss. Stick to your plan, no matter how tempting it is to bend it.
Trading Against the Current
This mistake is subtle but deadly. You might spot a gorgeous bullish ABCD pattern forming on a 15-minute chart. It checks all the boxes. But if the daily chart is in a deep, powerful downtrend, you're essentially trying to paddle a canoe upstream against a raging river.
Can it still work for a quick scalp? Maybe. But you've just dramatically lowered your odds of success. Before you even think about entering a trade, always zoom out. Check the higher-timeframe trend. If the overall market tide isn't flowing in the same direction as your pattern, you're taking on substantially more risk.
The Psychology of Pattern Trading
Discipline is everything. You will have losing trades, even on perfectly valid setups. That's just part of the game. A loss doesn't mean the pattern failed; it's a statistical outcome. You absolutely must resist the urge to "revenge trade" and try to win your money back on the next candle. Treat every single trade as its own event.
The flip side is just as dangerous: getting overconfident after a winning streak. A few easy wins can make you feel invincible, leading you to take lower-quality setups or get sloppy with your risk. Stay humble. Stick to the process that made you successful in the first place.
Statistically, the ABCD pattern has shown a high success rate on shorter timeframes, especially within the first two hours of a trading session. Observed data suggests that around 78% of successful ABCD signals on these timeframes pop up in this early window, which makes sense given its foundation in Fibonacci levels. If you want to dive deeper into the numbers, you can explore the findings on ColibriTrader.com.
Even with favorable odds, though, it’s your disciplined execution and unwavering risk management that will ultimately protect your capital from the market's inherent unpredictability.
Got Questions About The ABCD Pattern?

Even after you've got the basics down, applying the ABCD pattern to live charts is where the real questions pop up. It's one thing to see it in a textbook, but another thing entirely when your money is on the line.
Let's walk through some of the most common hurdles I see traders face. My goal here is to give you direct, practical answers that will help you trade these setups with more confidence.
What Makes a Good ABCD Pattern?
A high-quality ABCD setup is more than just a "lightning bolt" shape on your chart; it’s all about precision and symmetry. The best patterns, the ones that tend to deliver, have clean swing points and line up beautifully with key Fibonacci ratios.
Here's my personal checklist:
- A Clean Structure: The AB, BC, and CD legs need to be distinct. If the price action is choppy, messy, or overlapping, that's a huge red flag for me. I'll pass.
- Fibonacci Confluence: Ideally, I want to see the BC leg retrace to the 61.8% or 78.6% level of the initial AB leg. This shows a natural market rhythm.
- Symmetrical Legs: The time and price it takes for the market to move from A to B should feel very similar to the C to D leg. This symmetry is a powerful clue.
When you see these elements align, the odds of a successful reversal at point D go up dramatically. It's the market's way of telling you it's moving in a predictable rhythm.
Can I Trade This Pattern on Any Timeframe?
Absolutely. The beauty of the ABCD pattern is that it’s fractal. You’ll find it on a 1-minute chart just as you will on a weekly chart, which makes it incredibly versatile for both scalpers and long-term swing traders.
The key, though, is adapting your approach. On lower timeframes, things happen fast. Patterns form and complete in minutes, demanding quick decisions. On higher timeframes, the setups take days or weeks to develop, but the potential rewards are often much greater. You have to trade the timeframe that fits your personality and risk tolerance.
Key Insight: While the pattern is universal, I've found it to be particularly reliable on the 1-hour and 4-hour charts. These timeframes seem to hit the sweet spot—they filter out a lot of the low-timeframe "noise" but still serve up plenty of solid trading opportunities.
What If the Fibonacci Ratios Aren't Perfect?
Welcome to real-world trading! Markets are rarely perfect. You'll often see a BC retracement fall just shy of the 61.8% level or a CD leg push a bit past the 161.8% extension.
Don't be too rigid. If the ratios are reasonably close and the pattern's overall structure is clean and symmetrical, it can still be a perfectly valid setup. Think of the "ideal" ratios as a guide, not an unbreakable rule. Context is everything. A slightly imperfect pattern that completes at a major support level and has RSI divergence is often a much stronger bet than a "textbook perfect" pattern trading into empty space.
Ready to stop guessing and start finding high-probability ABCD patterns with precision? ChartsWatcher provides the advanced scanning and charting tools you need to spot these setups across the market in real-time. Start your free trial today.
